Showing posts with label diy. Show all posts

Wednesday, March 11, 2015

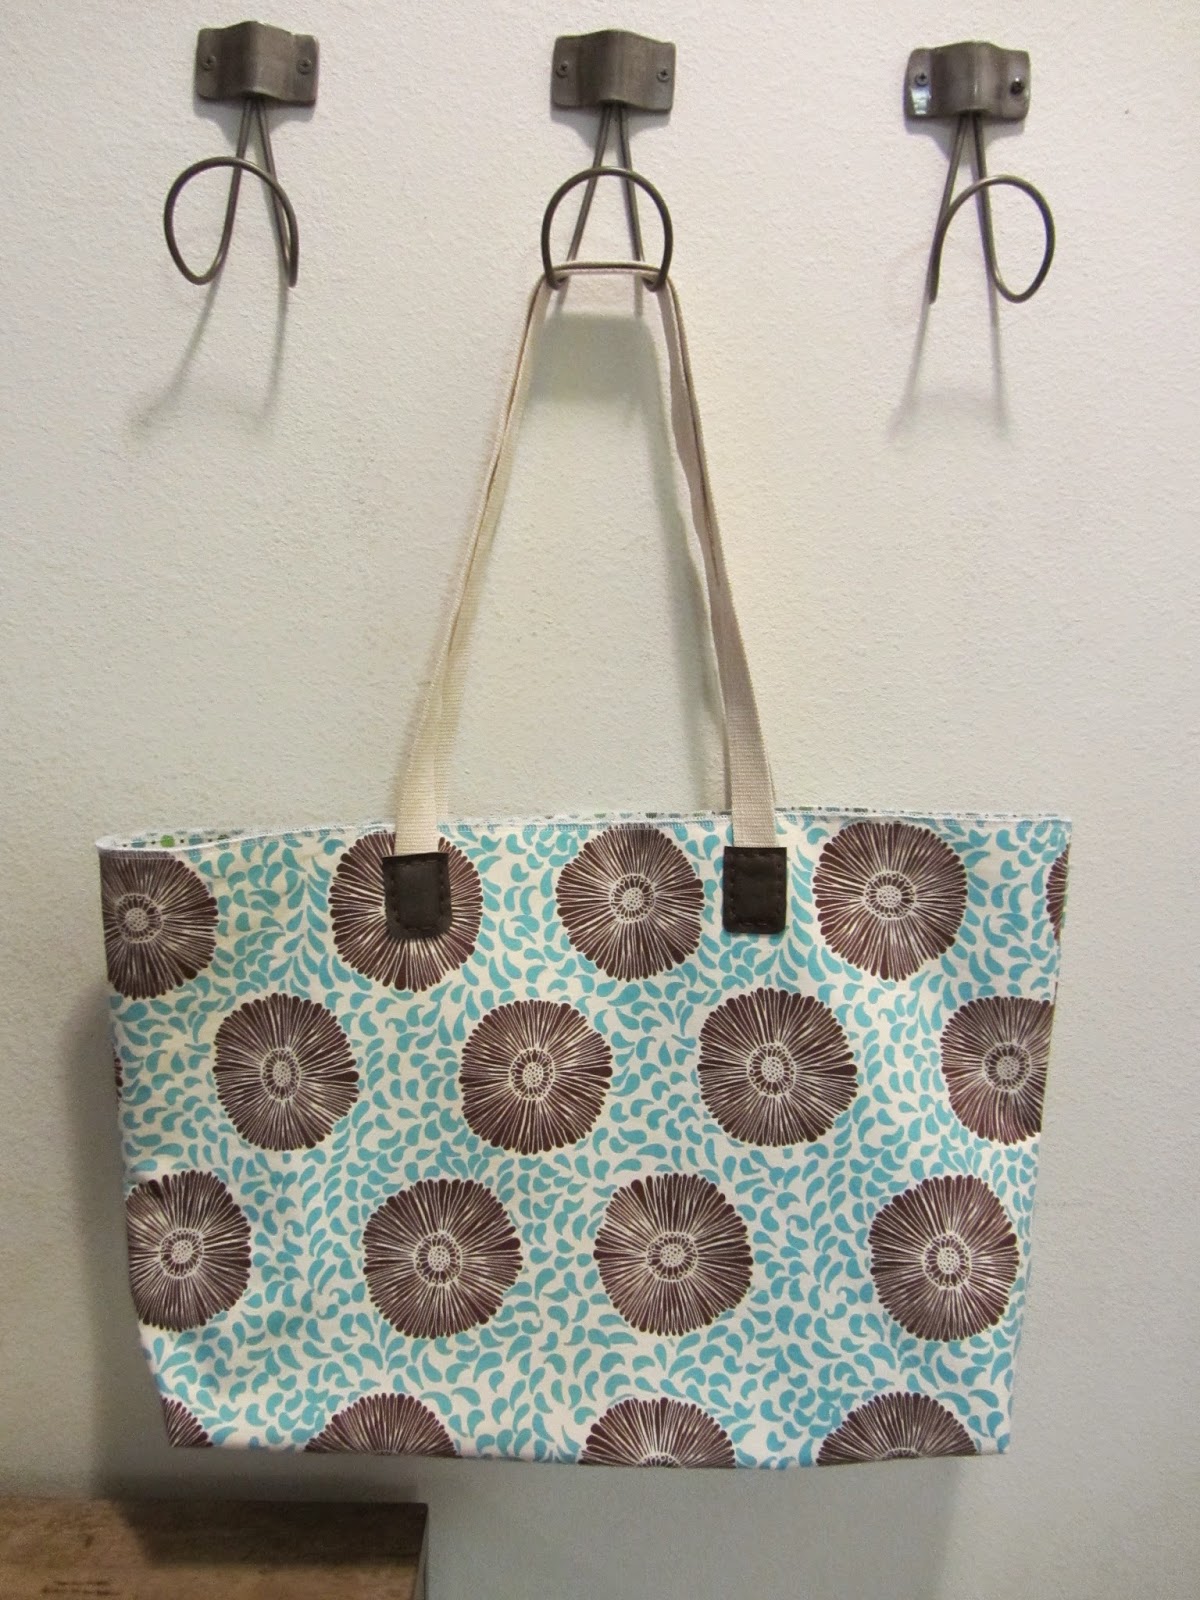
Best bag ever! aka The every day bag

Let's not talk about how old this post is... let just say that these were once xmas gifts - when I was actually on my game and gave handmade gifts. 

I originally made this bag here and I still love this bag a LOT. So a while back (ahem) I made these 3 bags for my Grandma, Cousin and Aunt 


I switched it up on the blue one and added binding on this version- which I love! 

Both of these fabrics were hand printed .... somewhere... and I bought it at the quilt show in Jacksonville. Love the way they look together!

This one was for my cousin. The fabric is bright and happy and reminded me of her. 

And for my aunt. Blue, green, circles, flowers... all things that when I see I think of her.

Maybe someday I will get a tutorial up on this. It is seriously so fun/easy to make and it is the perfect size for tossing stuff in a running out the door. It isn't meant to be a purse... more like a pool bag or gym bag or I carry to many changes of clothing around because I have kids bag... 
The hard part about making gifts is I want to keep all the things I make for people... now my stripped ones I love look plain and boring... haha


Wednesday, May 8, 2013

Pinterest Challenge- Spring Edition

It's here again the Spring Edition of the Pinterest Challenge hosted by Bower Power and Young House Love

I have been in desperate need of hooks in the kids room. Preferably over the door ones because I don't want to put another hole in this rental property. The two issues are that they are either ugly and cheap looking or awesome and expensive. I had almost pulled the trigger on some that I could live with (I hate spending money on live with items!) and then I had an epiphany. I had pinned this Letter Coat rack DIY from Oh Happy Day and this fabric wrapped wire 'hello' from A Cuppa and a Catch up. What if I combine the two and make it an over the door hook?! So I got to work and used only supplies I had on hand.

It turned out awesome! 
The fabric is the same I made her peacock quilt from.
So since it was so successful I made one for Micah too. 

I love that it is fun and very Anthro looking. And adds a pop of decoration to a spot in the room that is otherwise blank. 

Hope you all enjoy my project!


Monday, August 27, 2012

Isabella's Night light

So I've had a few requests for how I put together Isabella's night light so here it is.... 
Supplies
fishing line
white corded string lights 
extension cord
---------------------------------------------------------------------------- 
Screw in anchored hook 6" in from each wall. 
Attach the 3m hooks to top of cabinet about 4" back. 

plug in lights to extension cord, swag white string lights from ceiling to 3m hooks very loosely 
 using fishing line hang the 3 largest lanterns from ceiling hook 
 mix in the smaller lanterns to fill in the gaps
 tuck/hang tissue balls in the additional gaps

 plug in your lights and ENJOY! 
Let me know if you have any questions!!

*a few additional notes-- I plugged the extension cord into the outlet that is connected to the wall switch- much easier to turn on and off! Also I don't leave this on all night in her room. I just turn it on when I need it, it's dim enough to not wake either of us up too much but casts enough light to be able to change diapers safety. 

Tuesday, July 10, 2012

Micah's Tee Pee (the Pinterest Challenge Summer Edition)

I finally got my act together to participate in the Summer Pinterest Challege hosted by Young House Love, Bower Power, Centsational Girl, and Ten June (love them!). Since I am completely addicted to Pinterest it's awesome that someone has taken the initiative to get everyone to actually do something with their pins. 

For my project inspiration, I originally pinned a teepee featured on Happiness is Eva, who I started following after she used my garland for her daughters first birthday party. Hers was purchased from Angel at my Table which is an Australian company. I loved how beautiful and finished it looked. So after much additional perusing of available children's Tee Pee's I knew this was the one that I wanted to reproduce. 

My version--
I am thrilled with the way it turned out. I looked all over trying to see every random picture of these Tee Pee's I could find to figure out how they put them together. I finally lucked out when I found (duh!) the assembly instructions at their site. It filled in all of the details I wasn't sure about.  
It's large enough to grow with him as he gets older. (Uber and I can sit in there with him comfortably now...at the same time...) It's roughly 8 feet tall (to the top of the poles), 68" tall inside and 60" across at its largest point. 
I used a set of herringbone sheets (found at target), 5 bamboo poles, 5 dowels, 5 cord stops, clear vinyl plumbing tubing, cotton clothes line rope, velcro, scrap leather and leather cord to create my own version of the tee pee. It ended up running around $70 in supplies and took about a week of nap times to finish. 
close up details.  Seriously I think the photo below is my favorite. 
It was completely worth it to add such a fun (and I think stylish) play space to our living room for Micah. It sits in a corner that was wasted before and lucky him it has an awesome view of the TV. The adults in the house (and most who visit) may or may not spend time in there hanging out and wishing it were theirs. 
the lucky little boy!

Thanks for visiting!

P.S. I tried so hard to make a tutorial for you guys on this one but I got to the sewing part and was all DARN IT... they can figure this out for themselves!!! But if there is a lot of interest I can do a post on the set up and at least point you in the direction of how to go about it on your own. I really have to say the project turned out exceptionally well ... and believe me I tried very hard to mess it up! 

Sunday, June 3, 2012

Crafterhours Skirt Week - Simple Maxi Skirt


Jess and I are so excited that lovely ladies of Crafterhours invited us to participate in Skirt Week again this year.  We really appreciate all the hard work that goes into hosting an event like this. They are amazing women with apparently boundless energy. We find them very inspiring, like, all the time.
If you’ve been following along and catching all of the fantastic tutorials so far, you may have noticed that there seems to be a similar mind set this time around…. fun, wearable & easy.  Here at Created Blissfully we are feeling the same.
The hardest part about making this skirt will be picking out your fabric. You’ll want a fabric that is lighter weight and falls close to the body; this is the time to try something like a rayon challis, voile or crepe de chine. Don’t use quilting weight cotton, the gathers will have too much volume, it won’t have a light, flowing look. Go to your local shop and touch the fabrics before you buy. If there are no fabric shops with apparel fabric in your area, go to a ready made clothing store and check out the types of fabrics they use and how they look and feel, then when you search on-line, you have a better idea of how certain fabrics will drape. Though there are times when these fabrics are more expensive, the plus side is, a lot of apparel fabrics come in wider widths. I shop for a lot of my fabrics herehere and here.

Before you read my instructions, please remember I do not claim to be an expert. I am constantly learning new things from people, so if you have a better way, do it and share it with me!

Supplies you will need – fabric
                                     2 inch wide elastic
                                     polyester thread (this has more stretch to it)

1.      To calculate how much fabric you’ll need measure where you want your waistband to sit and what you want the length of your skirt to be, plus 1 ¼ inches for your hem and waist seam. Cut two rectangles to those measurements. Set aside.
2.       Fit elastic to your waist; make it snug enough to stay put where you want it to sit. Overlap the edges by a half inch.
 Using your stretch zig zag stitch, (see number 13) sew two rows of stitching to secure the elastic.


I used contrasting thread so you could see the stitching. Use the same color thread and you won't see what looks like a mess.
3.          Take your two rectangles of fabric and sew together at the sides.
4.       Sew a gathering stitch a ¼ inch from the top edge of the skirt, starting and stopping at the side seams. Leave long tails so it is easier to pull the threads.

5.      Gather your waist up until it is approximately 5 inches larger than the circumference of the elastic waist band, this will allow your waist band to stretch after sewing. Distribute gathers evenly and sew again at a ¼ inch to set the gathers.
6.       Divide your elastic waist band and skirt waist evenly and mark with pins.
7.       Matching pins, lay skirt on top of the elastic waistband overlapping a ¼ inch and pin together.
8.       Sew with your stretch zig zag stitch. You will want to stretch your elastic out to the ease of the skirt as you sew.  Sew carefully to keep the overlap at about a ¼ inch. I used a white thread so you can see it better, please use a matching thread for your skirt. This leaves a raw edge on the outside of the elastic. It's not up against my skin, that's the way I like it.

9.      Hem skirt.
10.   Wear!
Little Folks and Square Dance by Anna Maria Horner.  I simply cut enough of the smaller motifs to go around the bottom of the skirt and sewed them on. I'd been hoarding this fabric....                                   
Does anyone else wonder what to do with their hands with being photographed? I've decided holding my coffee cup is good.. 

                                        Rayon Challis print from Fabric dot com, no longer available.
Not sure why the only "sort of" decent pictures are the ones where I'm looking at my feet. 
The back edge of the tropical storm made it interesting trying to take pictures.

Of course you can make this skirt any length you want to, personally, I'm just loving the maxi length right now!
Now, if you haven't already, go look at all of the amazing skirts in the Flickr pools!


Thursday, January 5, 2012

Horsing Around

When we got home on New Years Eve Uber informed me we were staying up until midnight... not my initial plan (what?! 10pm is a completely acceptable time for bed on New Years!) and not only that, I had left all of my WIPs at Mum's house.... because I was going to bed! 

So after a brief glance over my project inspiration file I decided Micah needed a stick something. I had saved this picture... I think 4 or so years ago. And after some digging I finally found that these were sold at Wisteria at some point- sorry not anymore. 
So I went through my felt supply (I am trying really hard to use up as much of my supplies as I can over the next few months... since I will soon be giving up the closet space in the guest room), and decided it would have to be a plain old horse since I only seem to have large quantities of brown! 
The project ended up taking the 2 hours until Uber finally let me sleep and then another hour or so the next day. 
 It was actually a lot of fun. I had no plan and no brain. So I just cut out the general shapes I thought should work and then sewed them and then flipped it inside out and looked at it again before making more adjustments. 
 Once the general shape was together I stuffed him and hand stitched on his white spot and eyes. 
 It did end up requiring a quick stop by Joanns for the dowel, a wood plaque to keep his neck nice, and the red strapping. I think the project ran under $6
 And Micah finds it very funny. Although he prefers it if you (read Grandma) ride it around the house and chase him. 
 He does drag it around the house and I am sure when he gets a little bit bigger he will figure out the whole ridding it thing.
 Meanwhile it's still getting plenty of love! 
I also made a carrot... unfortunately I forgot to bring it for the pictures... oh well!