Showing posts with label pattern sewing. Show all posts

Monday, November 10, 2014

When patterns procreate...

We've been making an obscene amount of Bimma's for the kids thanks to grabbing the pattern on one of Crafterhours friday fivers, and we have been getting just a tad jealous of the awesomeness that the kids are getting to wear.......  Then it hit me that if we combined our favorite Union St Tee pattern and the Bimma's cowl neck, we could have our very own adult size. 
GENIUS people... even if I do say so myself......

The amazing part? The size 12 cowl from the Bimaa fits the small Union St. Tee.
Perfectly.
Jess wants one now and I'll see if the x-small is the same. I just couldn't wait to show this one.
This fabric is from Joann's. It is luscious. Dots on one side, stripes on the other.

If it were to ever get actually cold here, I can cover my face.
Next up? Maybe a hooded version.....


Wednesday, January 30, 2013

Who knew...

Who knew pattern sewing was not as hard as I thought it would be... I have actually ventured into it a few times recently (additional project pictures to follow soon I hope) 
The pattern is the popular Hopscotch dress by Oliver and S 

The blue one was worn about a hundred times before I got around to taking a picture. The green one was my second attempt and I borrowed Mums serger.
I made them in the 12-18 size and they fit Bella perfectly now (8 months) the arms are just a little long. 
She is growing up so quickly that I can barely remember her small. 
She finally has a second tooth coming in (as of last Sunday) and though she managed it a few times before, today is the first time that I feel she has truly grasped the forward motion crawling. It's very goofy, she kind of drags and hoists herself forward. She of course screams at you the whole time because she knows you could just give her what she wants with out all the exercise and that makes her so angry.  Hoping my chunky monkey will thin out just enough that her shorts stop cutting of circulation to her legs (you think I kid)
Don't get me wrong though I love every bit of this chunky girl and her fat cheeks. 


Monday, February 27, 2012

Ice Cream Dress

Oh dear, I'd forgotten how fun it is to sew little dresses. This Nicey Jane fabric used to be the bumper pads Jessica made for Micah's crib. I love reusing stuff, don't you? Jess picked the Oliver & S Ice Cream Dress. The fabric was a little less than eighteen inches across so I could only make a 6 - 12 month size. The solid is from Joann's. 
After seeing a version with a rounded collar, Jess decided that was the look she wanted. The button adds a bit of interest. Both the front and the closure button were some I had in my stash. They don't match but they coordinate with the fabric in a fun way.

 I added the bias trim to try and distract from the not so well matched strip I had to add to make it long enough.... 
I kinda love it.

Thursday, May 26, 2011

P is for pillow


This is for a little someone ... though it will be a while before she receives it because I am working on something else that needs to be sent with it.... There is really nothing better then initials and favorite animals! 

Thursday, May 19, 2011

A Manly Mixer Cover

Kris visited this past weekend and reminded me that he had requested a cover on his last visit - which was right after Micah was born... I had completely forgotten until he said something. So I whipped this cover up for him. I am totally digging the less fussy look. 
 The inside is just a solid black Kona
And the best part is they are super fast to sew up when you don't add the quilted strip! If you know a bachelor who loves to cook this would really be the perfect gift 

Go here for the

Wednesday, April 27, 2011

Simplicity Dress- modified

YEAH! My second dress is complete... after sitting around in my to do pile for weeks!
It's another Simplicity 2975
Mum of course supervised 
The fabric is Chestnut Hill Ironwork
Pockets were added 
and this time we modified the straps to have buttons ... for easy access
I really love it... 

Tuesday, April 12, 2011

I made a dress

With Mums help - of course! It was fun but I will never be a regular clothing sewer... way to many instructions, and I am fully aware this is a super simple pattern!
I LOVE it! It's made from Modern Meadow Herringbone by Joel Dewberry in Lake
Unfortunately I won't get much use out of it until next year since it's not nursing friendly 
But I have another one in the works that we altered to hopefully take care of that problem! Of course it has been in the same stage of incomplete for over a week now so who knows when I'll get around to finishing it!

Tuesday, March 22, 2011

Happy Birthday to me - To you! AKA the Stand Mixer Cover Tutorial

***Have you made a cover from this tutorial? Please take the time to leave a comment or upload a photo to our flickr group we would love to see it!!!***

Yes that's right FINALLY I have this up for you guys... it only took... years. I was originally planning on putting it up for sale in my etsy shop but I decided that for my birthday I would give it to you all. So please make yourself one or give them away as gifts (just please don't sell them-if you would like to please contact me to purchase the pattern). And for all of you who don't sew there are still a few left in my shop for purchase. 
This was made to fit my Professional series mixer (and fits the Artisan though it's a little large) If you have a high capacity Professional mixer I now have the proper cutting instructions listed in the directions so please be aware and look for those. 

Supplies
3/4 yard outside fabric
1 yard lining fabric
1 yard one-sided fusible interfacing
miscellaneous coordinating fabric scraps
coordinating thread
Tools
Stand Mixer
rotary mat
rotary cutter
ruler 
tape

**FOR HIGH CAPACITY PROFESSIONAL MIXERS**
replace the above measurements with the ones provided in the list below. 
Outside Fabric
15"x29” rectangle
(2) 15”x3” rectangles
(2) 12”x3” rectangles
(2) outside pattern pieces

Quilted Stripe
Cut out enough fabric scraps to fill
(2) 15”x3.75”rectangles
(2) 12”x3.75” rectangles
Lining Fabric
15”x39” rectangle
(2) lining/inside pattern pieces
Interfacing
15”x39” rectangle
(2) lining/inside pattern pieces


Tuesday, March 15, 2011

Lumbar Pillow

I've been trying to add a little more pattern to our living room so I whipped up this little lumbar pillow
The fabric is from Anna Maria Horner's Little Folks line.  
These two are so funny. I am going to be in so much trouble soon! 

Thursday, July 29, 2010

Did you think I would give up on the deer head?

Back on the inspiration board I posted for the nursery I had a deer head that zgalleries carries, unfortunately when I saw it in person the fantastic price showed in the quality of the item.... total let down (I love zgalleries though so no hard feelings)
I went through a bunch of ideas on how to make one and couldn't find a solution that I was sure I would be happy with -then I saw this nursery post and knew that was it. She actually got hers from here (there are none currently for sale). I of course decided to just make mine...
I finally sat down and got started today. I was amazed it didn't take me long I started working on it this morning and finished up this evening. That included a bunch of breaks and a trip out to Michael's to get the things I didn't have on hand.... I wish all projects went this quickly...and smoothly! So the pictures aren't the best but I just had to share tonight so you'll have to deal until later. It isn't even hanging in the nursery so the walls are totally the wrong color- I think she will look a lot better on a light blue wall!
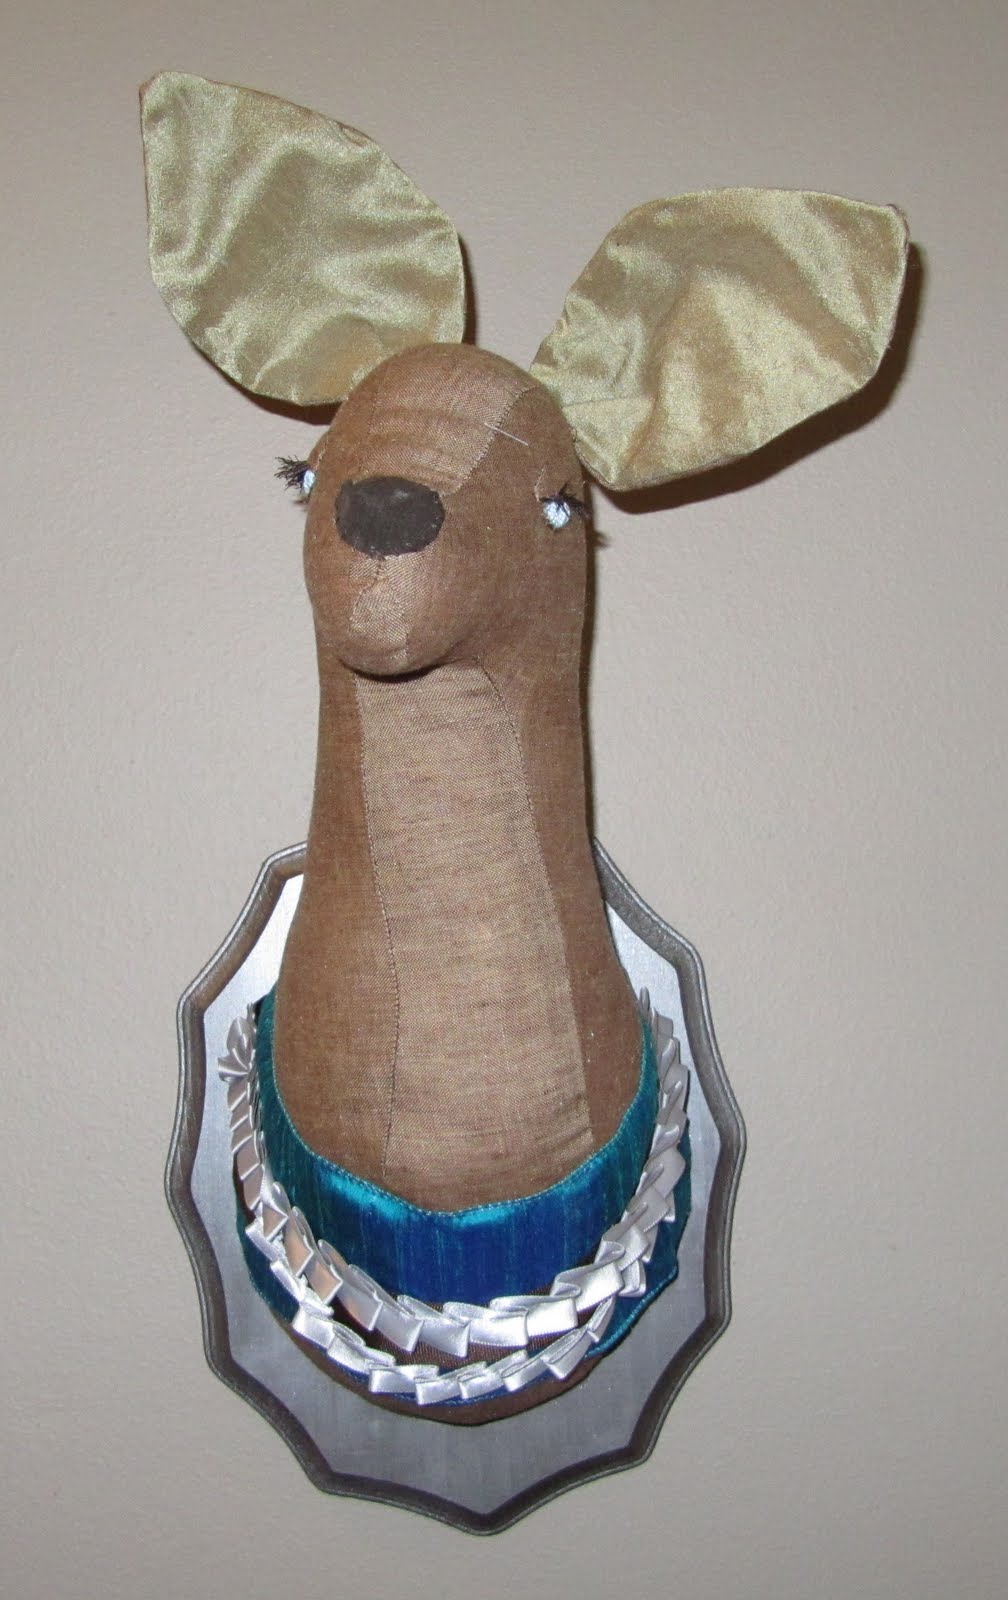
It is in fact a doe... Uber says he doesn't mind so I am not going to worry about it! I probably could have added antlers but I really liked it without them!
She's a little bit snotty in expression but that just makes me laugh...

Her body is linen (big surprise) and the inside of her ears are a duponi silk. Almost everything on her is stuff I already had on hand I only spent $15 to make her. The most expensive thing was her nose... I went ahead and used a leather scrap... I probably should have just used felt but oh well!
Her eyelashes crack me up...
The plaque is Gun Metal Gray.
I LOVE ribbon... I hope it doesn't make it look too girly I just could not pass up the beautiful peacock blue ribbon when I saw it. All of the ribbon reminds me of a military uniform
I am really excited about the way it turned out. I hadn't made a stuffed animal before and was a little nervous about totally making up the pattern but I have to say it was super simple.
Hopefully I will be able to show you more of the nursery in the next month... no promises though... it's kind of boring at this point I have a lot of things done but not enough to be interesting. I will continue to show you the projects I do complete which will start giving you sneak peaks at different parts of the room...