When
Crafterhours asked me to be a part of their skirt week I was thrilled. Susan and Adrianna have such wonderful energy, fun sense of humor and really cute kids! I've been a bit busy so the only way I could get this done was to call in reinforcement. Joining me is my daughter
Jessica from Insanely-crafty. Seriously, I would not have finished this if not for her.
I decided that I'd like to do a tutorial and show an intermediate skirt, that's really cute and slightly sassy.
Then I changed my mind.
What I need this summer is something feminine, cute and comfortable. I need a skirt that I can wear all day, is appropriate for work or home and maybe a dinner out.
Jessica needed a skirt that allows for all of the bending, stretching and lifting that goes with motherhood and still provide comfort and cuteness.
I need to show you how easy it is.
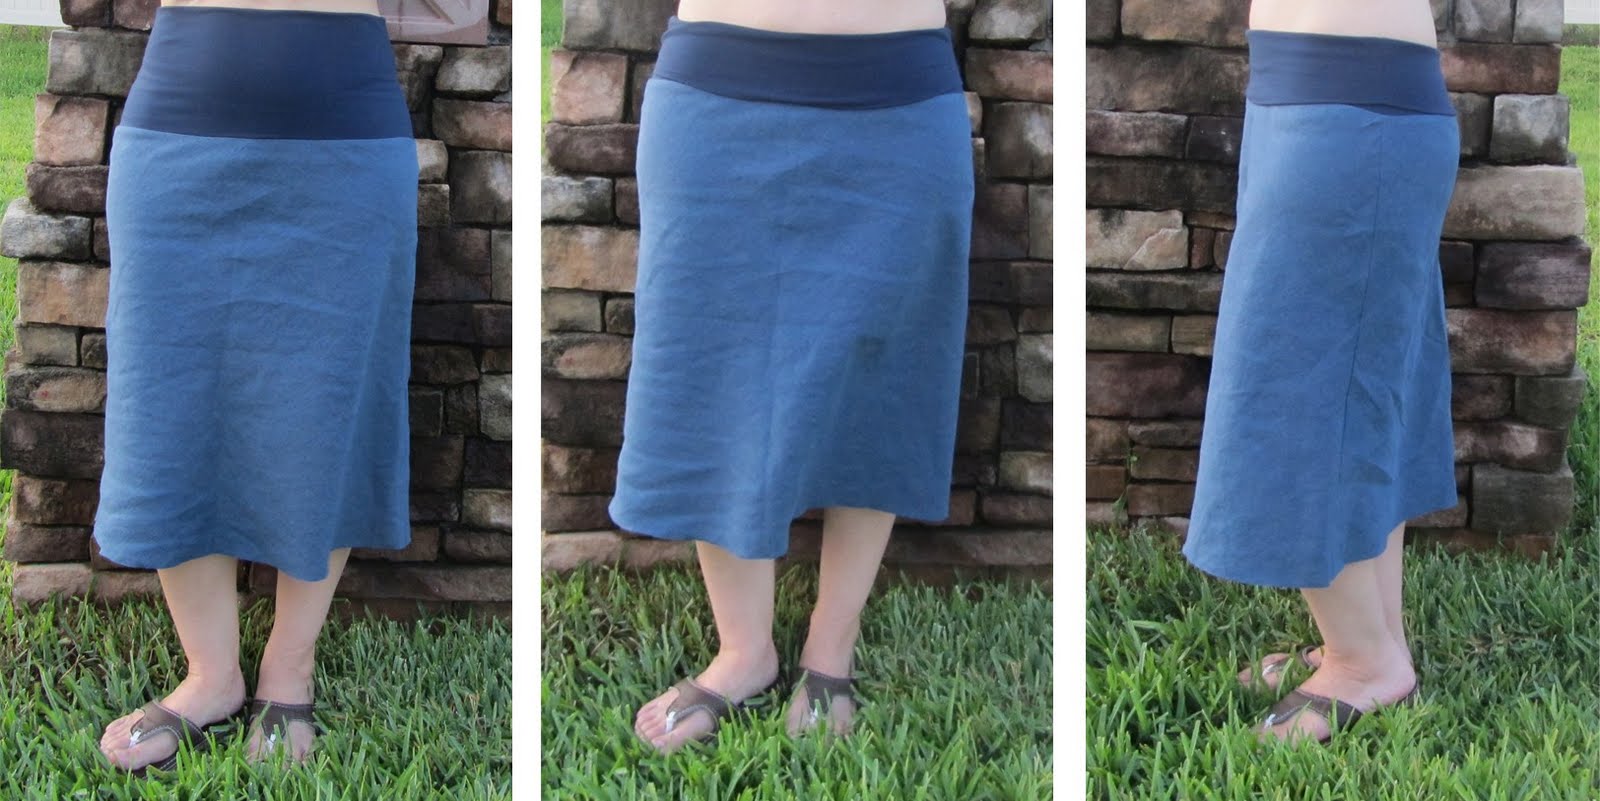
I give you the Don't Be Afraid of the Bias Skirt!
These are so easy, I made four one day and one more the next morning.
Once you have your pattern made, you can finish one of these in a couple of hours or less.
These skirts are super versatile. You can wear them with the waist up, folded in half or all the way down..... Jessica thinks these would be great for those with baby bumps too. Depending on how you put the waistband you can make the skirt a bit longer or shorter.
Disclaimer: I am not and do not claim to be a pattern writer. This idea comes from several different projects that I've done over the years. This may not work exactly for you. Please feel free to change it to suit your needs. Adjustments may need to be made to suit different body shapes. Please make sure your pieces are fitting before completing your garment.
Supplies
2 yards of 56” Wide Linen
½ yard jersey knit fabric (50 % stretch)
1 yard Pattern Ease
Ball point needle
Wash your fabrics before beginning. Yes, I machine wash and dry my linen. It makes it so much easier to take care of afterwards...
Take your measurements
Measure your Hips ÷ 2 = (H) ______
Measure about 1 inch below your belly button for your Waist Measurement = (W)_______
Create your pattern
Skirt
Using the pattern ease, draw out your pattern piece for your skirt. Draw a line to represent your hip measurement. Drop down 20.5" and draw a line for the hem. Connect the lines to make your skirt shape.
Add 1/2 “ arc to the bottom and top of the skirt pattern piece.
Mark your Bias on your pattern piece. It is really important to draw this line as you see it here. The proper bias cut gives your skirt stretch and movement.
Waistband
Fold rectangle into quarters
Mark 1 ¼ ” from side of pattern and 1 inch from top . Draw curving line to connect two marks
Cut along line. Here’s what your pattern should look like
Cut out your waistband and skirt pieces
Cut out two waistband pieces from the jersey knit.
Cut out two skirt pieces from the linen. Fold your linen fabric in half widthwise matching the selvage edges. Make sure the line you have drawn diagonally across the skirt is on the straight of the grain. You can measure from the selvage edge to the line to make sure.
Sewing
Waistband
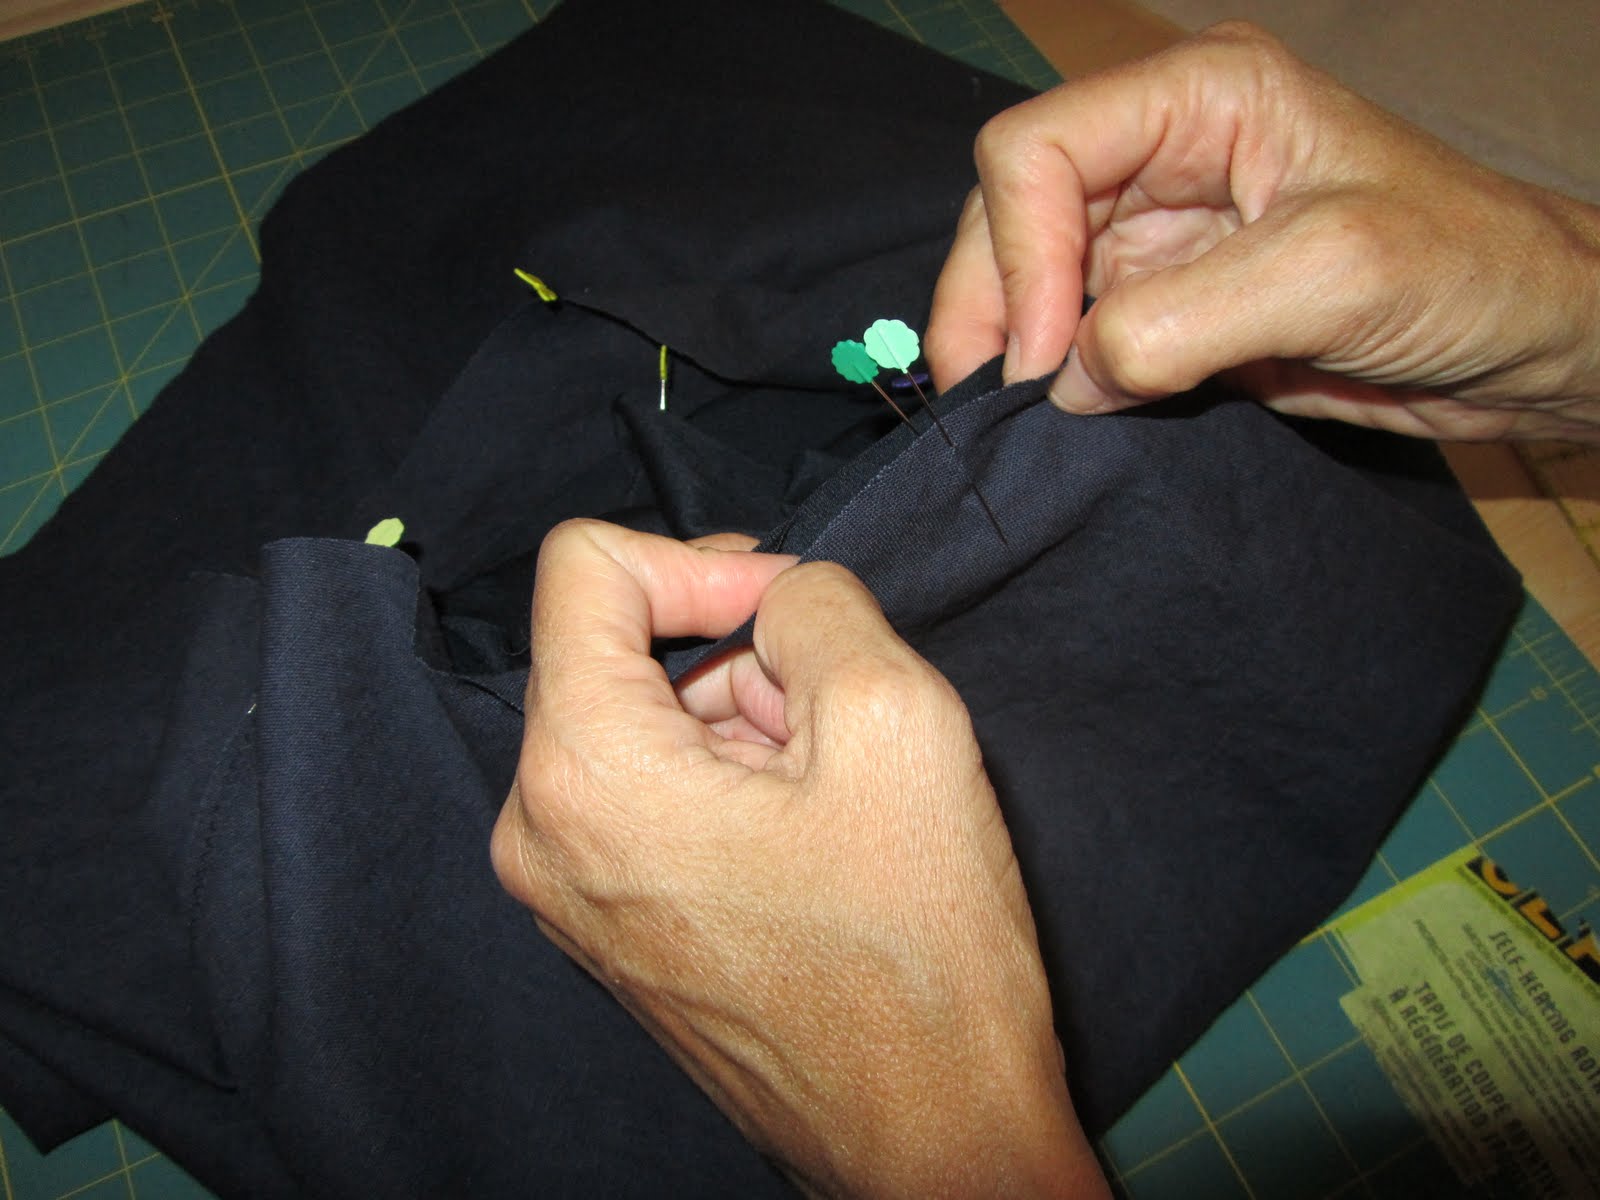
Use a stretch stitch and your ball point needle. The photo above is a picture of the stretch stitch I use on my machine. It should be the same on yours..
Sew sides with ¼” seam allowance.
Press seams open.
Fold waistband in half wrong sides together matching side seams. Press.
Divide waist band into quarters marking with pins at the raw edges.
Sew side seams of skirt with a 1/2" seam allowance and finish the seam allowances with the method you prefer. I wanted these simple and quick, with little bulk, so I sewed with a small zig zag stitch and then trimmed my seam allowance down.
Divide waist into quarters and mark with pins.
Place waistband to the right side of the skirt matching the pins at the side seams and in the middle of the skirt pieces.
The waistband will be smaller than your skirt waist.
Sew waistband to skirt with the same stretch stitch you used on the waistband side seams. Sew a 3/8 inch seam. As you sew, keep the area between the pins taut but don't pull the fabric, let the machine feed it. You will be stretching the waistband to fit the skirt. Go slowly and carefully, stopping at each pin to readjust and stretch your pieces.
If you choose to finish this seam be sure to use a stretch stitch. Iron seam allowance toward the skirt.
Hem with a narrow hem or go easy, don't hem it and let it fray a bit. You can sew a zig zag or straight stitch around the hem edge to keep it from fraying too much.
When you're done, try and keep yourself from wearing it everyday...... even out to the beach.
Please let me know if there's anything I missed!
Thanks for stopping, come back again, I am still going to show you the other skirt.