Showing posts with label wool. Show all posts

Wednesday, February 4, 2015

Skirt

Oh look! I made something for me, had my guy take my picture and I'm actually blogging about it within the same week. Will wonders never cease.
Confession time: I'm not the same person I was a few years ago. I've grown, and I'm not talking about my state of mind..... This fact has been a bit hard to come to terms with and made it hard for me to make things for myself. This skirt started out as a dress and it was tragic. I cried and threw it in a corner for a year. I mean that literally, my room is a mess. Sad part is, the fabric was beautiful.

 I read an article over on Melly Sews and it struck a cord with me. Yes, I have been sewing upwards of forty years, but I learned old school sewing (where each garment was made to last through the generations, whether the new generation wanted them or not), and I still beat myself up when I make mistakes. Funny thing is, when I was teaching, I would always tell my students, there are no mistakes, only opportunities. Why I cannot seem to apply that to myself I don't know. 

Coming across that wad of fabric the other day I knew it was time to do something with it or throw it out. 
Wanting to be done in one afternoon, this was not the time for me to get caught up in making the inside look as good as the outside. There is no lining or hong-kong finish on this skirt. I just needed something to wear and the pile-o-guilt to be gone from my room. 
I choose to try an exposed zipper because I happened to find a cool metal zip in my stash and it's quicker than doing a back seam and applying a invisible zip. Have I done one before? No..... because I have always been afraid of ruining my fabric. Am I happy with the results. Yes! I'll do better next time. Or maybe I'll mess it up.

I really went out on a limb here showing you both shirt tucked in and out. One is way out of my comfort zone...... 


Pattern used for general shape : Simplicity 8664
Fabric: Beautiful wool, bought so long ago from I forgot where

Thanks so much for stopping by!


Friday, September 5, 2014

Cat Bag

Next up in the bags for traveling kids series.... Kitty Cat pencil case. This was inspired by a pin I'd seen that led back to Tokyoinspired. This is our take on it. I love it a lot. 
created blissfully - wool cat pencil case
I made it with some gorgeous felt that I purchased in Germany from the loveliest little shop, which I am now kicking myself that I cannot remember the name. 
created blissfully - wool cat pencil case
It's unlined and except for the feet and buttons, the embellishing is by machine. Small pieces of wool for the stripes sewn on before assembling the front and back. Doing the nose and whiskers was fun. Scribbling with the machine might be something I should try more often.
created blissfully - wool cat pencil case
Then Jessica said, "Wouldn't it be cute if it had a fish?" 
So I did.
And it is.
created blissfully - wool cat pencil case
If for some reason Miss Boo doesn't like this, I may be stealing it back....

Thursday, December 13, 2012

These Boots Weren't Made For Walking.....

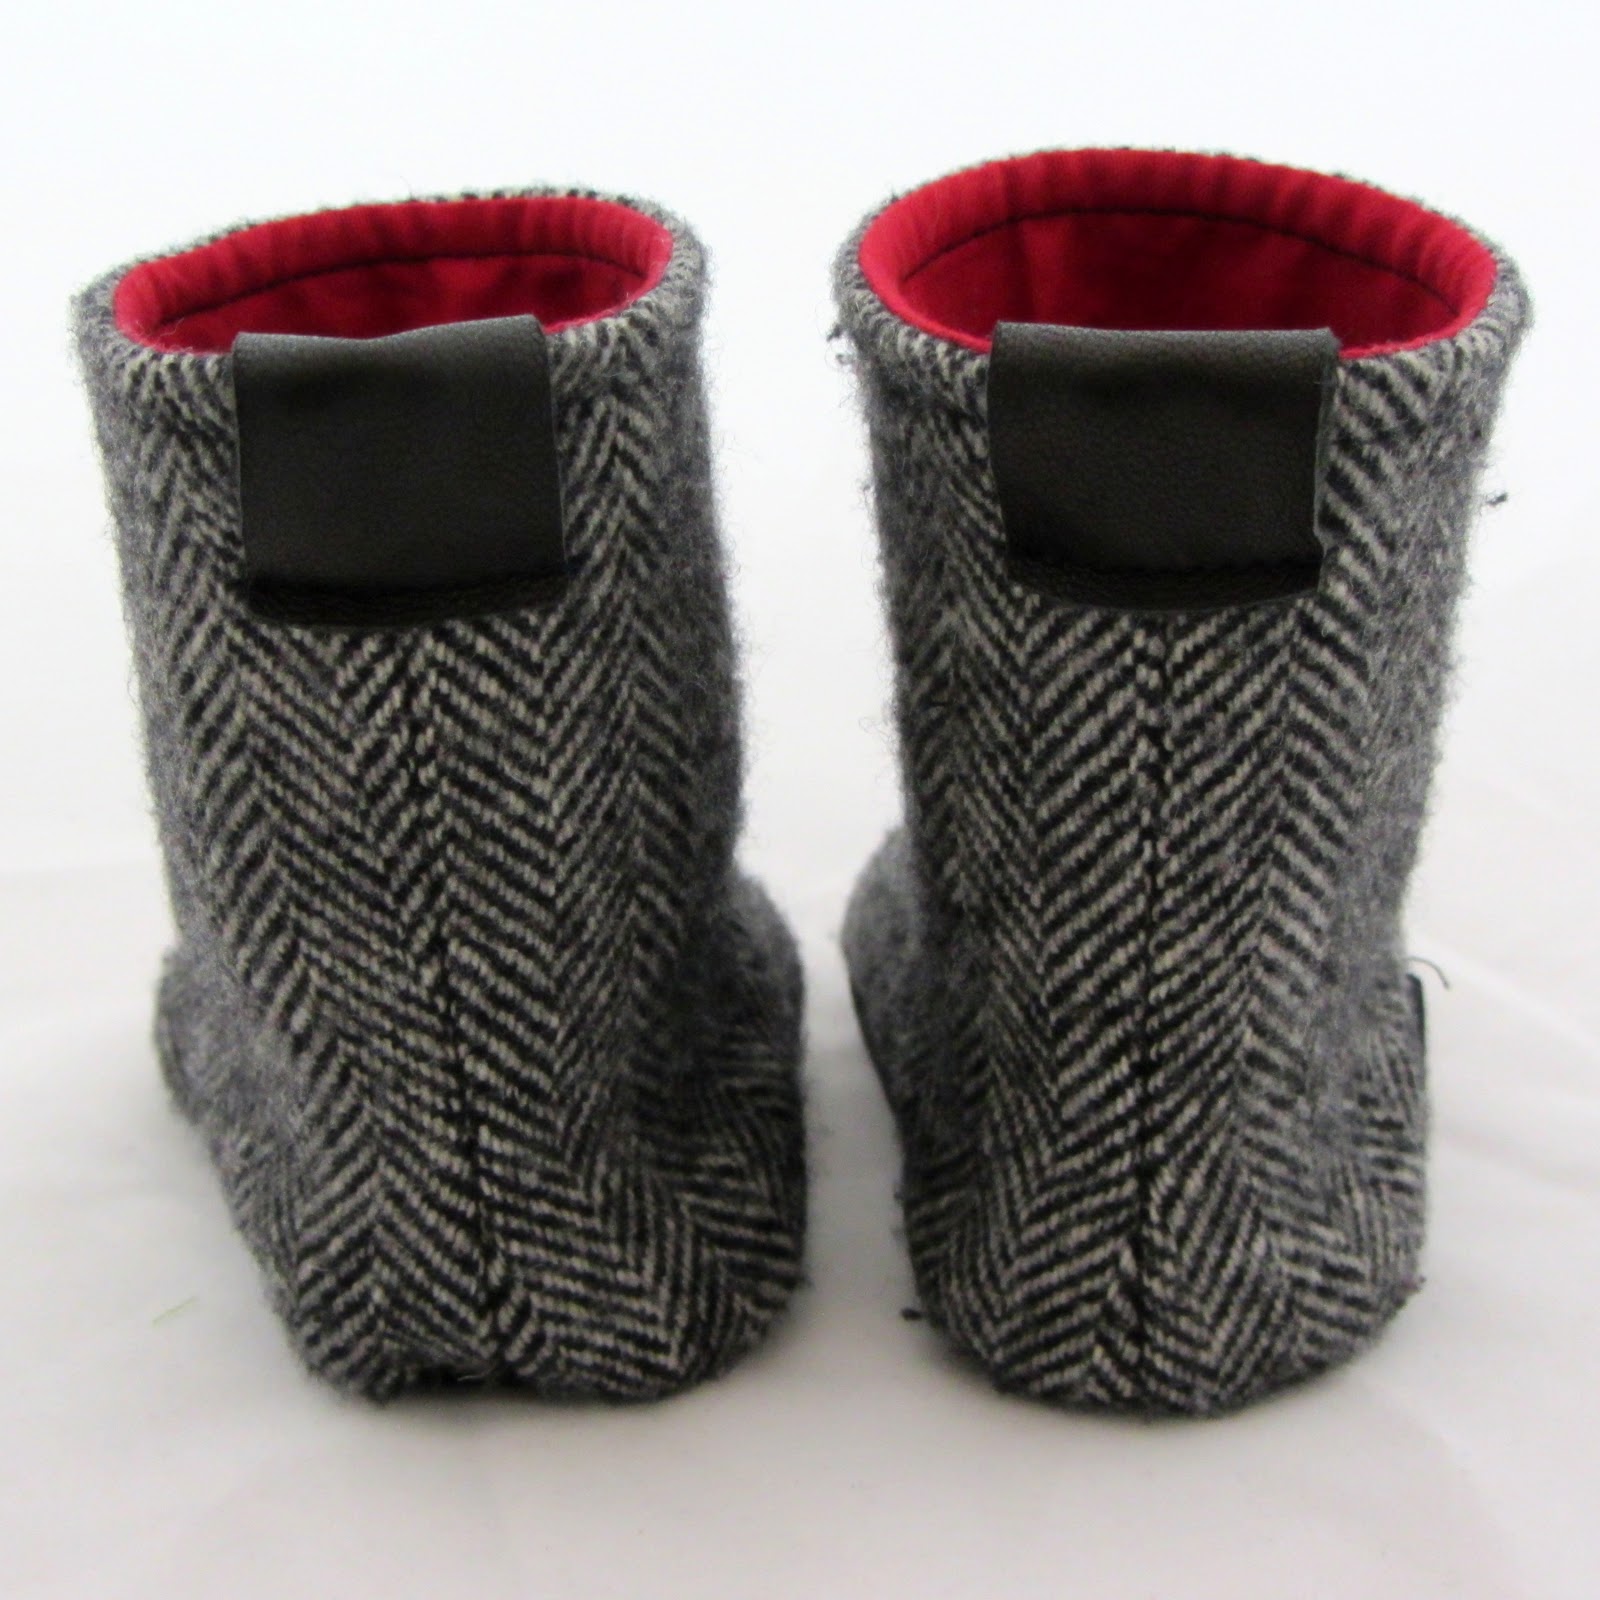
Baby girl needed something to keep her feet warm. 
Jess and I found some lovely wool fabric at the Jacksonville Quilt Fest. Then she found a shoe pattern she liked here. 

We had to make some modifications to the pattern. The calf was not quite wide enough and Jess asked me to leave the lining out of the foot area and attach it in the shaft area. It made a huge difference on how they fit on Bella Boo.
That black leather tab is hiding the elastic I added at the top.
Matt even got in on the design by requesting leather soles for this pair. This is recycled leather from an old jacket of his. I love recycling!
The pair below was the first set we made and we were working out the kinks.

They are usable but a bit more clunky.
I almost wore the wool out trying to get them right....
This girl seems to be growing so quickly. Before I know it, she will need boots for walking!
My girls, I love them so.
Yes, I got this girl some jeggings. It just seemed right with the boots. 
Now I need to get a couple more light-weight boots done and an all leather pair done, and a fur lined pair, oh and a fur on the outside pair and......

Friday, December 30, 2011

Felt Dryer Balls Tutorial

... Well I guess we just kind of fell off... 
We've been busy having fun and celebrating things like birthdays. Oh and doing some major crafting... none of which we've taken pictures of! Hopefully we will get busy and blog some of what we've been up to next week- but I'm not making any promises!

This is useful to everyone! Don't get distracted by the first two paragraphs!
I think  I have mentioned here before that I part time cloth diaper. We've been having absorbency/ water proof issues and it's been driving me crazy because over all I really love cloth diapers but leaky cloth diapers make me want to start a bonfire. Now before I lose you all this isn't just about diapering... this is just so you know how I came up with this project. I finally had a chance to talk to the one other person I know who CD's and she said she cut out dryer sheets altogether and uses wool dryer balls that she ordered from Amazon. I had never heard of these before. Am I alone in this? I've always seen the nasty looking plastic ones that I just couldn't bring myself to buy but Wool?! That sounded doable! 
So of course a lot of googling and I was ready to DIY some...actually I was ready to make Mum do it for me... but she liked the ones she made so much she wouldn't share! From what we read the best method is to use wool roving yarn it seems to have less piling problems then straight roving (old sweaters also work... but I'm not cutting up any I still own). The two brands we found to work best are Patons and Full o' Sheep. The Patons brand yields 3 balls and the Full o' Sheep yields 2. 
 Unfortunately Bernat was an epic fail... just keeping it real!
So are you ready?- this is really complicated.......
Roll the yarn into a ball. It's not necessary to wrap tightly just wrap with medium pressure that keeps yarn in place. 

I like to roll mine keeping all of the crisscrossing at the same spot. 
When you get it to about tennis ball size cut off 18 inches and thread a long doll needle.
Then I just run the needle through the ball on either side of the crisscross 

I just repeat this a few times until I am out of string.
It looks like a button. 
Now make a bunch of them... It's definitely worth wrapping the balls neatly they stay together better for the felting process. 
If you want to do the process properly do a quick hand agitation with soap and get the wool fibers started sticking together. If you are lazy like me (and have wrapped them really well) then you can just toss them in the washing machine on hot and add a little soap.
They will come out looking a tad smaller and felted. 
Now you can stop here but if you are bored and want a total time suck you can decorate your balls-- 
Be prepared to be addicted it's fun! The stitch decorated ones are mine, the awesome perfectly decorated ones are Mums. She crocheted a net around them and they look beautiful!
 For best results have 8-12 in your dryer. We've been using ours for a few weeks and I really have to say they work just as well if not better then the dryer sheets did. Uber has even given them the ok - which means everything had to remain as comfortable and soft to wear as it previously was.  
I'm not going to go on and on about the benefits. There is plenty of well written information out there on how and why these work just visit this Etsy seller she has beautiful products and also sells oils to scent the balls. 


Wednesday, March 30, 2011

Toadstool Terrarium part 2

I made my first one back in January... who knew it would take this long to make another! This could seriously be addictive if only I had the time to be addicted! 
 The photo above was taken with a light box- which mum and I finally ordered and is really awesome (though this is my first time using it and I only had one light ... and really no idea what I was doing)
 This one is not in a light box... because I was to lazy to get it out at this point... and below on the shelf above our dinning room table where it will live. It still need to do something with the three jars on the bottom shelf ... it will probably include felt but I don't think it will be a terrarium...
 And here's a shot of Micah (totally unedited as far as I know) a friend took this picture at the wedding. Look at those eyes! This little booger is almost 6 months old and he is all sort of mischievous already!
I have something fun to show you tomorrow... though I will probably post a little later in the day then normal...

Saturday, February 26, 2011

Simplicity 2866

I made this a couple of weeks ago and yes, I am just now getting around to showing you. It's finally warm enough to take pictures outside comfortably. For me. I'm a wimp. 
 I got the fabric at Joann's back in October. Kinda forgot about it until one Saturday morning when I woke up and decided I needed a new dress.
 I really like the embroidered flowers.
 The pattern was super simple. I did change the front to have tucks instead of pleats... 
 I'm not sure it's the best style for me but it's easy to wear and I just needed something new. 

Wednesday, February 16, 2011

Leather Fun Part 2

The Spotted Pillow - because who wouldn't want one?!? This was my second idea for the leather.

I cut circles out of the leather and then decided to add a punch of color in as well so I used 100% wool felt in 3 shades of blue. I didn't plan the layout as well as I probably should have but I think it turned out ok. The leather spots are smooth and rough side out to give the brown spots texture.
I then hand stitched all of the dots on with pearl cotton.
It was a really fun project. Though not baby friendly since leather probably wont go through the wash that well. But that's ok because it was made with someone in mind who may or may not have a problem with circles.... that person may want to locate a 14x26 pillow insert... if that person is reading this and wants it!

And here is a Micah shot for you- he's playing with a gift from his Aunt Sherie sent him and he LOVES it! Its a maple wood teether. I just put it on his play mat the day we got it in the mail and he found it all on his own and started chewing
It's now one of his favorite toys. He loves that his Happy Apple and his pirate bear- golden beard who I need to get a picture so you all can see him!