Showing posts with label house. Show all posts

Monday, April 30, 2012

The rest of the house

Thanks for all of the love on Micah's room. I personally want to move in so I'm glad everyone else feels the same way-- he better watch himself! Isabella's room is getting closer.... I am very frustrated that I am not done yet! I just can not find what I am looking for... soon hopefully... her room is really lame compared to Micah's!

So much work crammed into one post! My goal with this move was to get everything done (good enough) before the baby arrives because I figure I am not going to do it once she's here. We signed a 24 month lease so we're already down to less then 22 months - unless we decide to stay longer which who knows - but I didn't want to be working on this place I just wanted it together so we could live in it and focus on more important things like having 2 kids and craft projects in my soon to be uber limited spare time. This is a big change for me since we constantly worked on the townhouse and I always had a list of wants going there. But I am embracing it. As I mentioned in the last post Uber even talked me out of painting (it would have made an awesome difference in this place!) and I am actually ok with it. Which is a good thing because it's not happening now that everything is hung up! 
So moving on I showed our floor plan here.
The condo runs somewhere in the 1650 sq ft range, which is roughly 250 sq ft larger than the town home and all on one level (amazingness). The room sizes on the floor plan are somewhat questionable to me... not sure where they decided some rooms begin and end since their measurements don't match the walls measurements but the layout of everything is correct. 

First up entry way- This space is huge. I am currently looking for an inexpensive solution to put under the cork board. It's the last thing on my list of 'needs' for the place. I had a desk there but Uber thought it was too big so we craigslisted it. I would really like a tall narrow-ish table but a bench might work too... so far haven't found anything I love though. 
 This kitchen is huge- about 1 1/2 the space of the last one and yes there are two pantry's -- the one on the right holds craft supplies :) 
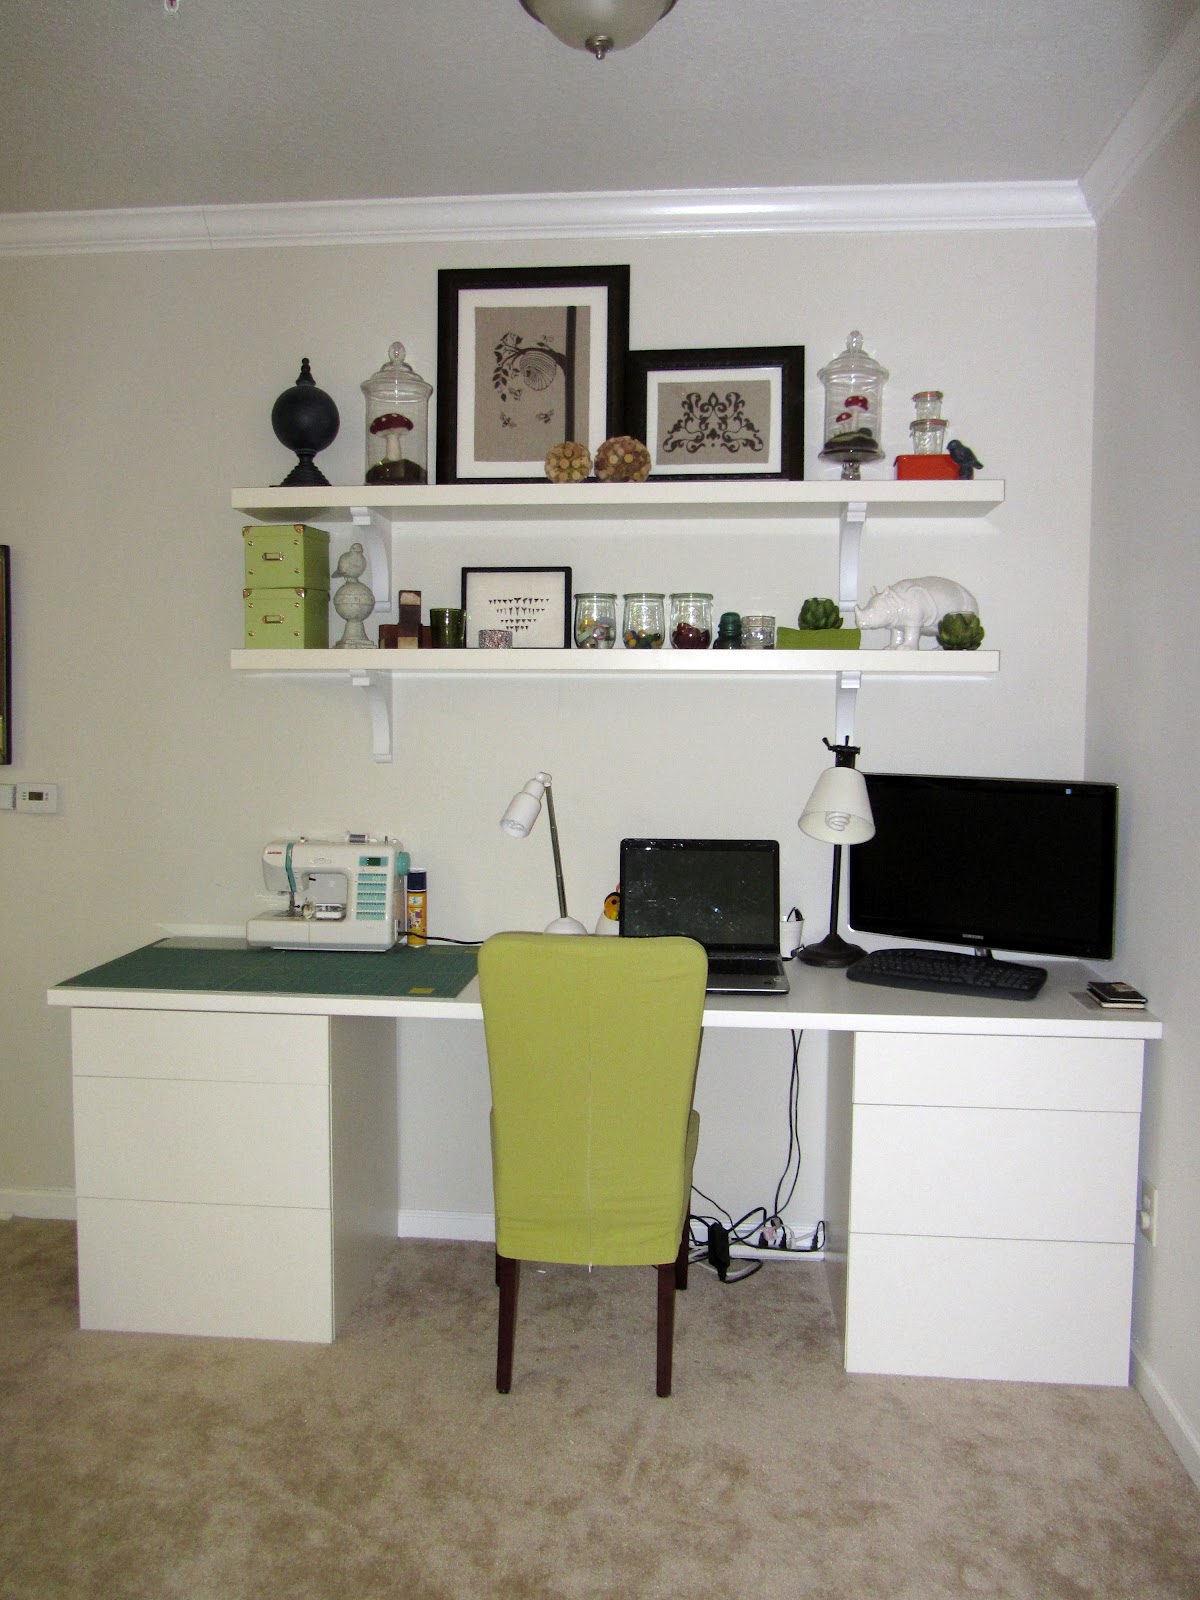
 The dining room is supposed to be over in the corner - but there was this huge wasted space infront of the kitchen so I decided to put the dining table there and use the dining nook for my new crafting space. I LOVE having a space! It's fun because it's in the living area so I don't feel stuck in a room away from everyone. And because of this I use it all of the time! And I don't have my stuff all over the dining table anymore like before (which makes Uber happy) 
 After a lot of research Mum and I went down to Ikea and picked up the work space. It's 2 - 24" base cabinets with an 8' counter top. Instead of raising it up on legs we just left it floor level. It ends up being a little taller (I think around 32") then a normal table height but for typing and sewing it's kind of nice because I don't hunch as much as I used to. Mom got the same set up for her craft room (one of those things she hasn't shown you) so maybe soon we will fill you in on her work space! Meanwhile I really need to get on Uber about hiding my cords... 
 There are two projects in this picture I never showed you all- one the mat under Micah's chair - I made it to save the carpet, it's awesome! You can buy them but I just used laminate and binding I had around. Why do people carpet eating areas?!
 The second thing is my Easter garland- which I guess I will show you next year. It turned out super cute...I never got the chance to blog about it and I really need to get up there and take it down! I made patriotic garland for Memorial Day/4th of July and I need to get that up and show it to you!! I really want to have garland for every holiday- it's such fun punch of color to add to the room. 
 I LOVE the living space it is so open and bright. And Micah is passed out on the couch he likes to sleep like that... 
 The lanai- which is just a fancy word for screened in porch. We love this space it's smaller then our previous lanai but it stays clean since we are on the second floor and it doesn't have an A/C unit  so it's quiet! Micah likes to play out here and shout and wave at people. 

 This is the kids bathroom. 
 I would still like to add more color in here but we will see if it ever happens. It's the only room with no natural light. 
 Master Bedroom- It's so large, actually the whole Master Suite is, which is really unnecessary but oh well. 

I have some pictures of Isabella's room... need to get a few more things done. I am having a really hard time with the blah walls in her room... I think it's because it's a new room and unlike the others that were already similar at the other house I can't look as easily past the lack of color. Add to that the 9ft ceilings and not being able to find things I like enough to purchase it's been slow going. Poor child is already a bit neglected : )

Hope you enjoyed the pictures!! 

Thursday, January 12, 2012

Walls Go Up lll

This should be the last in this series..... There's one other possible wall change but that's down the road a bit.
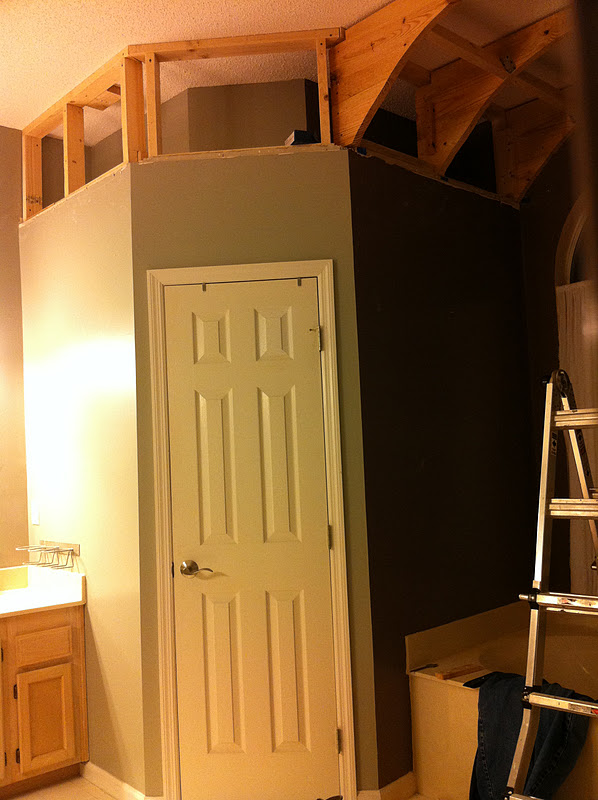
So this first picture is the way before. 
As soon as I saw this area I knew I wanted to change it. The open spaces at the top of the closets is such a dust catching area. I was never, ever going to put any thing up there so closing it in was a great idea and while we were doing that, why not make an arch over the bathtub area???
You Know Who, being the ingenious guy that he is, did some research and came up with this plan. 
I do think he is rather clever.
Very determined too.
I was very anxious to see it done.

I think the wait was worth it.
My view when I indulge in a bath. 
Oops, I keep forgetting to fix that broken chain....


Monday, September 19, 2011

Stairs

I have been totally jazzed by the numbered stairs that have been all over the web. I have yet to see a place that lists vinyl numbers specifically for this purpose (I think pottery barn kids may have had them at some point) and everywhere I looked into having them done seemed a little excessive... so I figured a DIY was in order
It took me a little while to think of an easy way to accomplish it but it finally hit me- black contact paper. I found it off of Amazon for somewhere around $11 (I actually bought the chalkboard contact paper because it had better reviews). 
Then I played around in Publisher until I found a font I liked and a good text size. After that it went fast I just laid out my printed numbers on top of the contact paper and cut through both  layers with an exacto knife. 
With just a little bit of measuring they all went up super fast. They have been up a few weeks and they continue to look good and are staying stuck. I would suggest cleaning your stairs very well so there is no dirt to get in the way of your sticker sticking. I took this opportunity to finally fully paint my stairs since I was so sick of painting when we originally refinished them that I had never bothered to finish .... and then forgot all about it. 
I barely used any of the contact paper so I see more projects in the future. Martha Stewart has all of the neat holiday silhouette stickers at Michael's so I might have to try my hand at something like that. 

Wednesday, July 27, 2011

Corner Cabinet

There is an empty useless corner in our upstairs hallway that is big and yet small at the same time, it sits right outside of Micahs room which has french doors. I have been diligently searching craigslist for corner cabinet possiblities for MONTHS and finally succeded the weekend before we left for California this popped up- it looked terrible on the post but I figured hey why not go check it out.
I'm so glad I did!  It ended up being exactly what I have been looking for (minus the beach scene). It is solid wood and the lady was more then happy to sell it to me for $100 - What!? Ridiculous! She could have easily got double from what I have seen (I found it online, unfortunately they don't list a price).
I finally found time to sand it down, repaint it and add some pretty crystal knobs. Uber also anchored it to the wall and redid the quarter round so it fits into the corner snuggly.
I am so beyond thrilled about this I have more plans for finishing off this upstairs area - it's going to be the  'travel' themed section of our house...

Wednesday, March 16, 2011

Kitchen Improvement

This wine rack has bugged me since we moved in. Yes I selected for it to be there (though honestly I have no idea why) but I never expected it to be all awkwardly up high like that and 5 years into living with it, it's become clear that it is completely useless we usually put a bunch of San Pellegrino up there for decoration and it all just collects dust and is a total pain to clean. Yesterday when I was deep cleaning the kitchen I realized that the wine rack is just held in with little finishing nails... awesome! 
So I talked to Uber about it and asked him to rip it out. But when I got up this morning I realized... who needs him! So I did it myself and I LOVE it! I have always wanted a book shelf in the kitchen and have been trying to figure out ways to put one in ... duh! I would still like to do something with the awkward space below the cabinet but for now I am extremely happy with this improvement.
P.S. Why can't I decide on a fabric and make myself a kitchen aide cover- so irritating!

Tuesday, February 1, 2011

Chalkboard Paint = hours of fun

I have a few  plans to update our house this year- just fun smaller things to spice things up a little since I am home all day. The first thing I wanted to work on was our entry way which I have never really done anything with. It's pretty small so there isn't much that can be done but it went from this:
 To this:
I used chalkboard paint to make the area a little more interesting. Below the cork cork board I also put a few layers of magnet paint so now the fridge magnet letters can be used here as well. I drew birch trees on the one wall but I plan to switch it up through out the year... or really just when every I feel like a change. Also I bought chalk markers which write on the walls much better than just plain chalk and they don't come off unless you use water- so no worries about someone brushing the wall and being covered in dust. 
 This is behind the front door Mum and I found this fantastic HUGE mirror at Home Goods for a ridiculously low price- I have been looking for a mirror for here forever and hadn't found anything I loved and was affordable. The frame is really neat. And now I can get one last peak at what a mess I am before I leave the house.
 A better view of the cork board/magnet wall. That is Micah's silhouette down there, his grandparents traced him!
 So another room that has been bugging me for a while is this small half bath its very narrow which makes putting artwork on the big wall that you face when you walk in difficult because it feels like its in your personal space- Excuse the OLD photo I forgot to take a before so this is a pre new flooring photo!
 Chalk board paint now covers this wall to- so yeah i am totally embracing the writing on stall walls look in here. Weird - probably but it's a lot of fun.
 And anyone is welcome to add decorations - infact the walls are a lot more decorated now than when I took this picture. I figure I will wait until it is filled up and then think about erasing and starting over.
 Here's a view of the other side of the room. It's just impossible to get decent photos!
And if you have ever wondered  it may not seem possible but you can in fact fit 3 adults and a baby in this room.... 

I know this look wont be for every one but it has been fun for us and a quick coat of paint will put it all back to normal if I should get bored with it-- that's what I had to tell Uber when he walked in from a business trip to see half painted black walls in his house... I realized I hadn't really run the project by him... SURPRISE! But he ended up really liking it so I guess it is a good thing I forgot to ask because talking him into it would have been hard (apparently)

Tuesday, January 4, 2011

Master Bedroom

Uber was nice enough to help me make a headboard while he had a few days off with the holidays. I LOVE it! I finally (5 years later) feel like we have a complete master bedroom!
Here's a reminder of the before with the new side tables

And here is the after!
I went back and forth on buying verse DIYing and finally after looking everywhere I decided I just had to try it myself. I was amazed at the high prices in the stores and the not so great quality! Plus I wanted a bed skirt that matched to make it look completed since our room is a little small for the whole bed frame thing.
The nail head trim was key for me- it took a few hours but I think it was totally worth it!
And a not so great shot of the bed skirt.
So the project break down:
Fabric- $55 -6 yards of Coffee Divesitex Whitney Linen/Rayon Blend...
Joanns-$15 -2 yards of kona cotton to finish off the back, and 2 yards of 90" muslin for bed skirt
Foam and upholstery batting- $50.80 - I am so happy with this company! I completely recommend them to anyone needing quality foam. They had excellent and fast customer service. I told them what I was making and they told me what I needed (and their recommendation saved me money!) Shipping was fast and inexpensive- it's part of the total above!
Home Depot-67.48 - this included the 2x4's, sheet of mdf, bolts to attach headboard to bedframe, screws, wood glue, and a ton of upholstery tacks!

So total is $188.28 for the headboard and bedskirt- not bad!


and here is Micah with his Uncle... just because the photos made me laugh! He is not into babies so it's fun to make him hold Micah!! Micah finds him very interesting to watch but not so much on being held by him... I think it has to do with Beau holding him completely awkward I know they'll be good buddies when he gets a little older... and doesn't randomly spit up/poop!