Showing posts with label embroidering. Show all posts

Tuesday, June 11, 2013

Embroidering

Uber, the kids and I went on a vacation to Charlotte, Charleston & Savannah a few months back. I wanted to take something with me because it was going to be a ton of time in the car. I decided to just take linen and embroidery supplies and figure it out on the way-no pressure since it was supposed to be a vacation.
I ended up giving Uber the choice of a few verses. He chose Psalms 150:6 and I used this pinterest pin to draw out my pattern -I had to freehand it since I didn't have a printer- I think I got it pretty close. It was nice to be able to mindlessly stitch away and not have to come up with anything!

There is just something about embroidering that is so fun. 
The bird was off of this pin. Flowers from here.
The Butterfly is from here. 
I do wish the bird had turned out closer to the original but when I actually looked into the bird later I think I found that it was done over painted fabric... or something like that... Oh well... 
Finally blogging this make me want to get our supplies and start another project. 
Hope you enjoyed


Friday, February 10, 2012

Mendocino Mermaids

Did any of you guess what I was up to? I am totally going to blame Jan she showed an awesome pouch that she received in a swap and I was super jealous (she even named the post- Jealous?- how did she know)! Then Mum sent me a pin that linked to this embroidery. So when we came upon this frame and Mum asked me what I was going to do with it. I was all 'I am thinking of doing an embroidery...' mermaids never crossed my mind and when she mentioned it (DUH!) we both knew that had to be it. 
Please excuse the photos I tried really hard but it was super difficult to get even these photos- I'll try to get better ones at some point but I couldn't wait any longer to show you guys!
The opening on the frame is 16" so these are very large-compared to the originals. 
I did a mix of the two inspiration embroideries and then added my own touches. The solid color of the tails is actually 3 different threads to give them dimension. 
The girl on the lefts face is a little truer to the fabric, the girl on the right isn't quite right but I liked her expression so I went with it. 
I tried to remain true to the fabric. The fabric is linen I backed it with a fusible cotton - the kind you would use to stabilize a collar. It was a super fun project. 
It was originally done for Bella's room but who knows maybe I will hang it somewhere I will see it more- Uber likes it which I wasn't expecting so we will have to see where they end up!

Wednesday, July 6, 2011

Re-purposed embroidered pillow

Silly me I forgot to take a before picture. But I have had a sack dress sitting in my cupboard that Mum made me back in high school. I didn't wear it much - because who knew a sack dress is rather sack-ish (she told me I wouldn't like it but I of course wouldn't listen) It was a copy of a dress I saw in Delia*s. And being the awesome Mum that she was she put all of the embroidery on it too-- in hindsight that is why the dress was so cool anyway!
So because of the embroidery I have held on to it meaning to re-purpose it for longer then I would like to say... I am getting old people... haha
So here it is-
Now a pillow. I put a ric rac trim around it because it's fun and seemed to fit the embroidery
I haven't decided yet what I am going to do with it/where it will go 
But it's fun to have it be a usable object after having it take up space for so long!

Friday, June 17, 2011

Family Tree

I ordered this pattern after Jennifer blogged about it here. I had seen her prints a few years ago and saved the picture... and then had no idea where I had found it so I was super happy to find it again and to see that she had an embroidery version out because I like it even more than the print. 
I thought it would be the perfect project for our car trip- and it was but it took considerably longer than our trip to complete... who knew traveling with a baby in the car gives you less time? 

 I went back and forth on pillow or wall hanging but pillow won out... I can always stretch it later...
 I added the green stripe for fun- after having to do it on my other pillow I have grown to like the detail.

I need to find more short term projects to do so I have more to show you!

And just because look at what this guy got a hold of yesterday. His face cracks me up it's like - DUDE have you seen this stuff?-- AMAZING! Funny but I hope he doesn't make a habit of it!

Wednesday, May 18, 2011

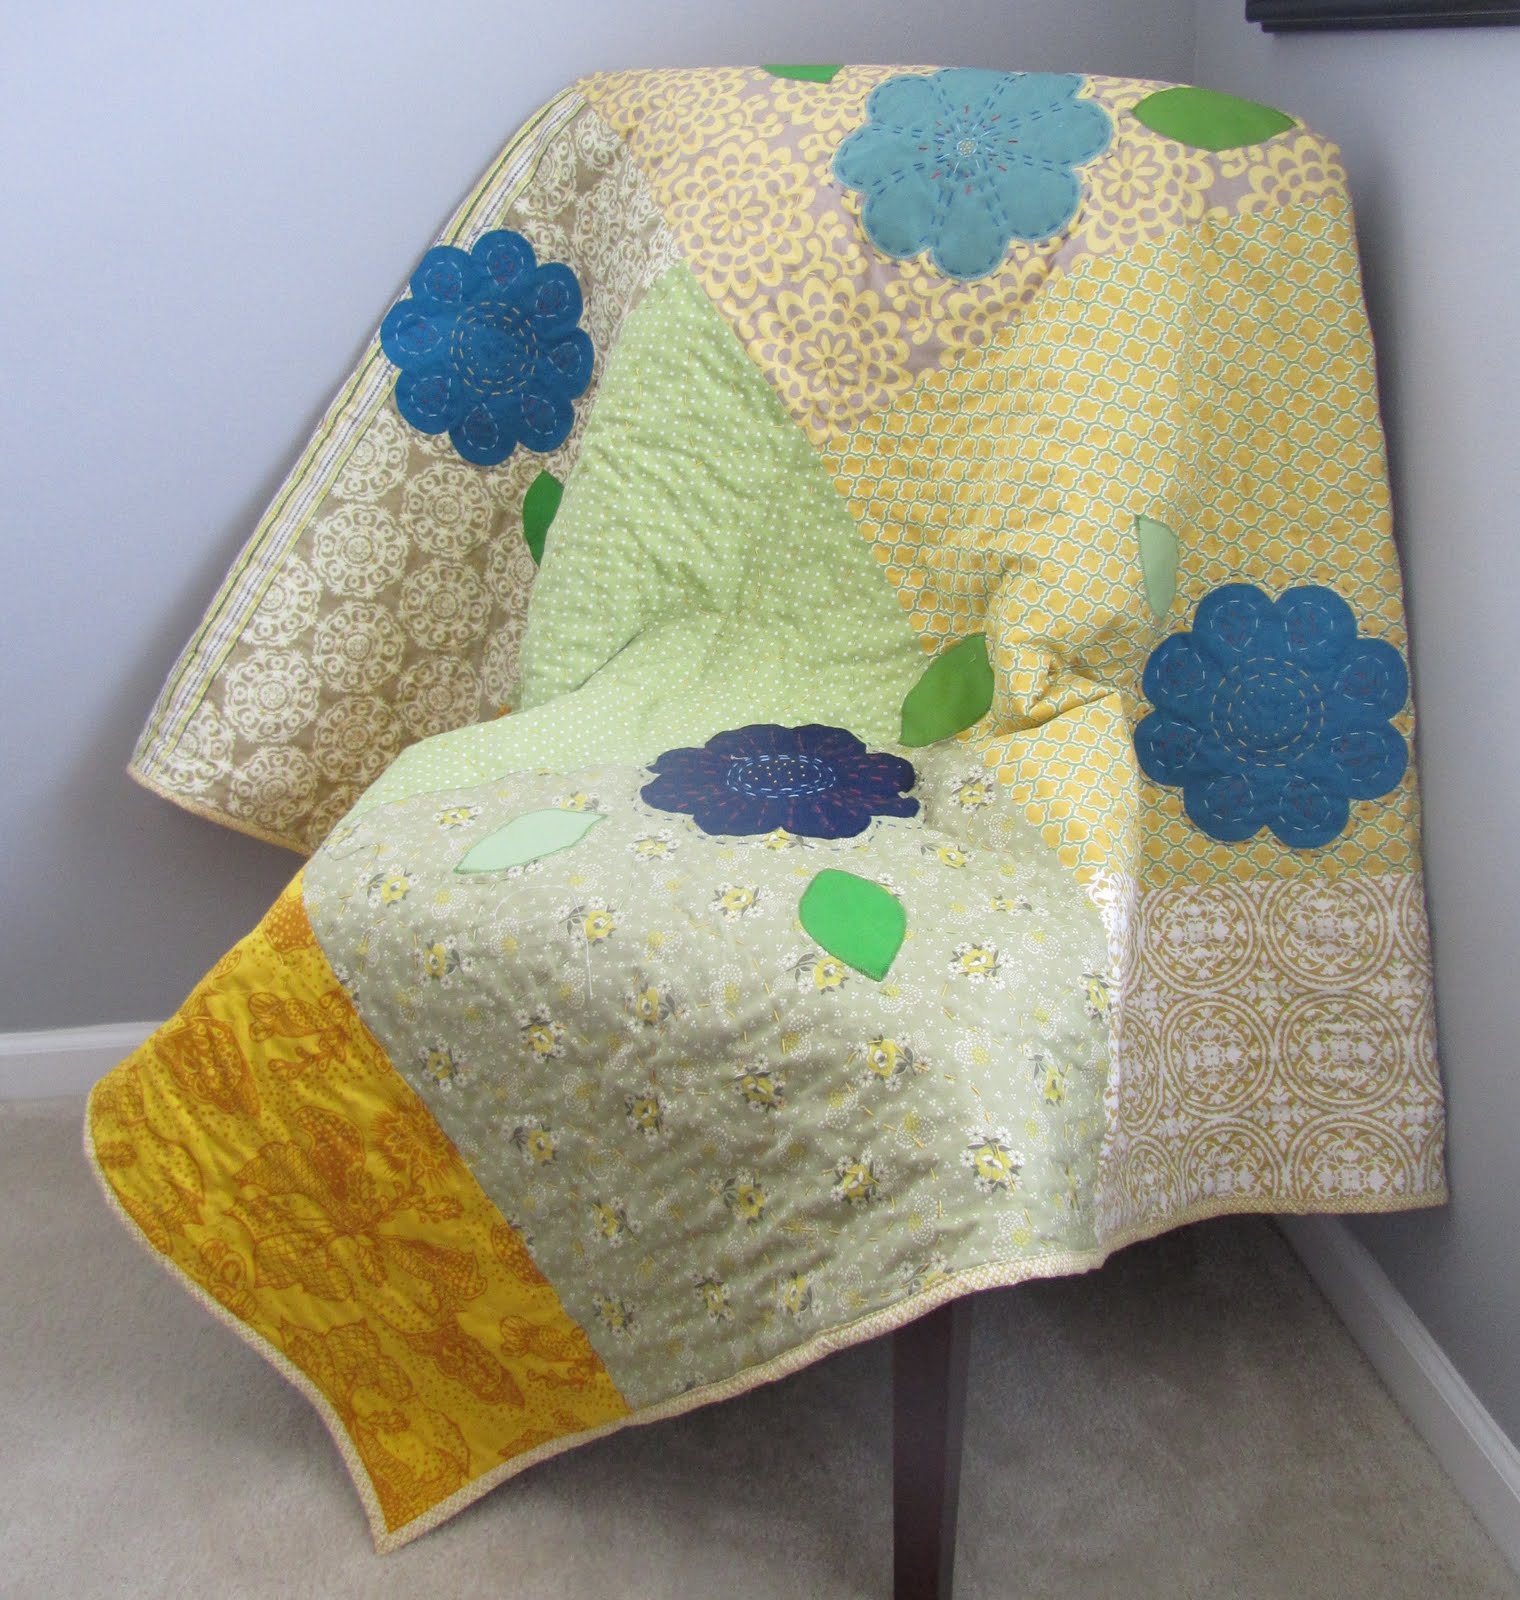
Picnic Quilt

Here it is completed! Sorry it's a little wrinkled in these pictures it has already been used a bunch... and I hadn't had a chance to clean it when I had the opportunity to take the pictures
 I am SO happy with the way it turned out-- taking the pictures was the first time I saw the back laid out and I think I might like the back more than the front! It's just so yummy and simple! So the pattern, appliqué designs are all mine... but it is all super simple stuff
 I ended up hand quilting the hole thing in loopy swirls that come out of 3 of the bee's bums- it's random and funky stitching, I probably could have kept my stitches smaller but we've been using it and it hasn't been a problem yet
 I painted on the bees stripes- the bee's were impossible to find before and now they pop out at you.
 I added embroidered detailing to the flowers.. I could have gone for days doing this but I tried to keep it simple. I ended up machine stitching my binding on- so much faster and this quilt will be through the wash so much I figured it would hold together better that way.

 And just in case you were wondering 4 grown ups, a baby and a dog fit easily
 Micah enjoyed us all being together so much that he decided to sit up on his own for the first time while we were taking the photo below
 Then Grandpa let him ride Brinkley!
So much more to show you guys!

Friday, May 13, 2011

Quilt in Progress

Well one week became two... my bad
I thought I would share more of my planning process... I had been wanting to do something with bees so the picnic quilt seemed like the perfect place
Yes I did make the gargantuan quilt more complicated... and I kicked myself the whole time I did it but it just HAD to be done this way... 
Here's a peek  of the top. Mum and I spent a good two hours pinning it in place... the whole sandwiching process is my least favorite part- even over quilting- and misery loves company so mom helped and the guys entertained us... much more fun then doing it on my own! (oh Uber undid the safety pins for us...and dad watched Micah in addition to entertaining us I don't want to forget that part- very helpful)
As for the two weeks part things just got crazy busy around here - I did in fact finish the quilt completely on Thursday and about a hundred other things... so I will be back to play catch up and show you everything next week- promise!

Friday, January 28, 2011

Box of Chocolates Garland Giveaway *and the winner is*

 I want to thank everyone for participating in my giveaway and welcome everyone who is new- I hope you continue to visit because I have a lot of fun things planned! 


So without further ado the winner of the garland is~

The winner has 5 days to contact me or a new winner will be selected.

I really hate that I can't give everyone who entered a garland so I put together this tutorial for you and I hope you will make one for yourself! If you do please add it to my flicker group so we can all see!


Please do not sell anything made from this tutorial it was provided free to you for personal use only. 


Materials and Supplies
dark and light red felt*
white felt*
dark and light brown felt*
DMC Embroidery floss: (2) red, (2)brown, cream
4 feet brown grosgrain ribbon
1/8" wide brown ribbon - length of garland
scissors
pinking shears
hot glue gun

*wool felt or a wool blend felt work best for this project. If using acrylic it's best to use felt by the yard as opposed to the small sheets of the felt. Felt by the yard is a thicker product and will hold up better with the embroidering. 

Instructions
Each heart will need two base hearts in addition to the top layer (if top layer is desired). Use one of the templates to cut out all three layers

 Use your scissors (or pinking shears) take the top layer and cut the heart smaller. Be sure to keep the shape of the heart consistant.
 Use your scissors to do the same to one of the base hearts. The heart you cut down will be used as your backing heart.
 When you layer your two base hearts they should look like this.
 The three hearts should now look like this.
 Take the top heart pair (on the left) and embroider as desired
Below are some ideas for decorating. 
*Helpful hints*
My personal preference is to use all 6 strands of the embroidery floss.
On the undecorated cream hearts  I use 3 layers since the cream felt is slightly see through

 When you have finished decorating all of the hearts, lay them out making sure the garland will look well balanced when its completed.
To prepare the ribbon. Sew 1/8" ribbon through the grosgrain and tie it off.
 Using your hot glue gun pipe a line across the top of the heart. Make sure to put the knotted ribbon far enough into your heart that the backing will cover it.
 Pipe hot glue onto the backing heart and let cool for just a second,
 then sandwich your ribbon so all of your thread and ribbon is covered.
 Continue adding hearts to the ribbon until the garland reaches the desired length. Repeat the ribbon tie off on the opposite side of the garland.

Start decorating!
And please don't forget to add your project to insanely crafty's flickr group so we can all see!